INSTRUCTIONS FOR TAKING PHOTOS TO SUBMIT TO ETICK.CA
The identification of ticks based on a photo can be difficult since they are often small and/or engorged with blood. A good view of the key features and a crisp image are therefore essential to identify which species of tick you found.
→ Ticks can be quickly immobilized by placing them in a freezer for 10-30 minutes. This step is not necessary but can make it easier to take a photo and send specimens in the mail if requested.
To view our video on “How to Take a Tick Picture”, click here! Further details, including examples of good and bad tick photos, are also provided below.
Recommended devices for taking photos:
1. Digital camera with a macro mode (or lens).
2. Smartphone (any model less than three years old).
NOTE: Some tablets are equipped with lower quality cameras than smartphones and often create a lot of shade when taking a close-up picture; hence images taken with tablets may not be of high-enough quality to allow us to identify which species the tick belongs to.
Instructions for taking photos:
i. Lighting: Bright lighting is very important for taking close-ups. The tick should be photographed in daylight (outdoors or by the window) or placed directly under a lamp. A flash may help under low lighting conditions.
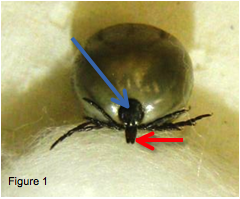
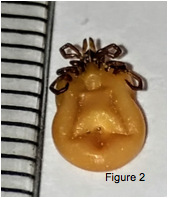
ii. Orientation of the specimen and scale: The tick should be oriented in such a way that its back, dorsal shield (blue arrow), the head, and palps (red arrow) are clearly visible (Figure 1). If the tick is heavily engorged, placing it on a cotton or paper ball (Figure 1) can help. An image of the underside of the tick (Figure 2) should also be submitted. If possible, place a ruler or coin near the tick for measurement purposes (Figure 2).
iii. Camera settings: Position the camera approximately 7-15 cm from the tick (avoid blocking the light if possible). Then zoom in to get the largest image possible while keeping the image clear and in focus. Taking several photos will allow you to select the best one(s) for submission.
iv. Preparing the photos for submission: If possible, adjust the lighting and crop the photos before submitting them so that the tick takes up at least a quarter of the image. NOTE: Digital photos cannot be larger than 10 megabytes (10 MB) each. You can submit up to three photos per tick.
Examples of good photos taken with an iPhone 4S:
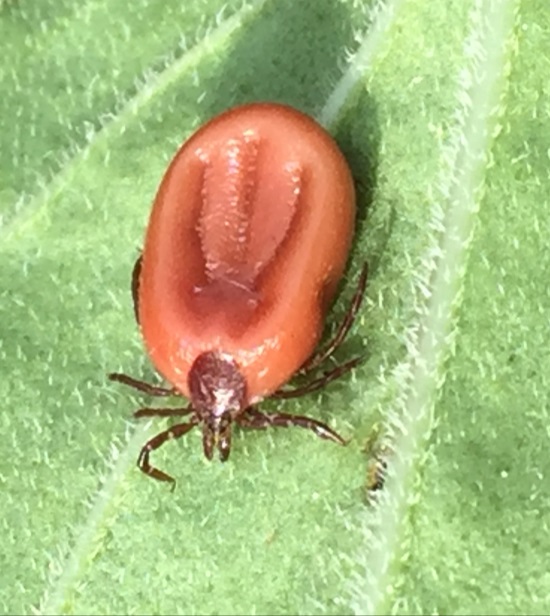
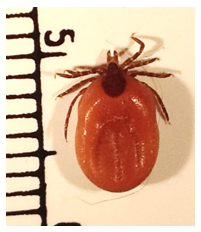
Figure 1
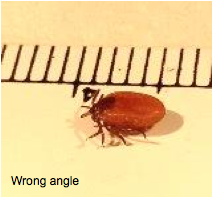
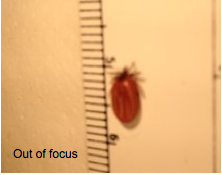
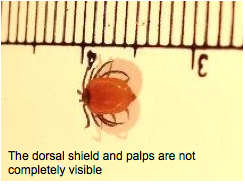
Examples of bad photos: